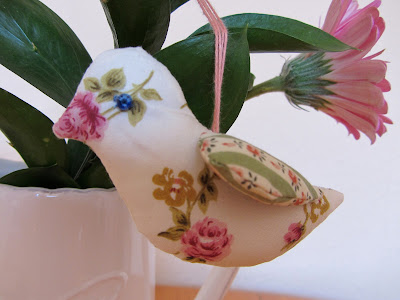
Hello birdie,
The inspiration for this cute little creature originally came from the Cath Kidston book, sew. The original was designed to be a child's mobile but I thought they would look super cute hanging around the home, so here is my version of little birdie. Today he happens to have taken up residence in the bunch of flowers in my very cute birthday present jug! Now, I don't have a garden, but how cute would it be if I managed to make the birds out of waterproof oilcloth and they could be hung in a tree in the garden... maybe in a blossom tree... one day!!
To make a hanging bird:
- Draw and cut out your bird template
- Cut the bird pattern from two pieces of identical fabric and place them facing together
- Sew around the bird's outline using a 1/4 cm seam allowance. Leave a 3cm gap along the birds back to allow you to turn the bird inside out.
- Now that your bird is facing the right way fill using toy stuffing until the body is quite firm. Hand sew the seam shut.
- To make the wings cut 4 identical pieces of fabric in the shape of the wings. To make each wing place two of the pieces right side facing together and sew around the edge like you did with the birds body, remembering to leave a gap to turn and fill.
- Only lightly pad the wings otherwise they will not hang down beside the bird's body. Sew shut the seam and hand sew the wings to the body.
- Sew on a bead for each eye.
- Use a piece of thick thread or ribbon as your loop and attach just between the top of the wings, this will ensure the bird hangs straight.
- Find him a lovely home!!
tweet tweet xxx


Cute! I made these from the CK book for Christmas presents..they went down a treat :) Hx
ReplyDeleteThat's so cute! I just found your blog (read your post on the Folksy forum!) so have been enjoying a look around! I have started following you!
ReplyDelete